Step-by-Step Guide to Typing Arrows in Google Docs in 2025
Arrows can enhance your documents by making them more visually appealing and organized. Whether you need to create flowcharts, highlight key points, or add directional symbols, Google Docs offers several ways to insert arrows. You can use shortcuts, special tools, or even draw them yourself. Learning how to type an arrow in Google Docs will save you time and improve your formatting. Both Windows and Mac users can access these features with ease, ensuring a seamless experience regardless of your device.
Typing Arrows in Google Docs: 9 Solutions with Detailed Steps

Arrow Insertion Methods Comparison
This chart compares the ease of use and flexibility of different arrow insertion methods in Google Docs:
Using Keyboard Shortcuts
Typing basic arrows (e.g., →, ←, ↑, ↓)
Keyboard shortcuts are one of the fastest ways to type arrows in Google Docs. You can use specific key combinations to insert basic arrow symbols like left, right, up, and down arrows. These shortcuts work on most Windows devices. Here's a quick reference table for typing basic arrows:
- Left Arrow: Alt + 2190 + Alt + X
- Right Arrow: Alt + 2192 + Alt + X
- Up Arrow: Alt + 2191 + Alt + X
- Down Arrow: Alt + 2193 + Alt + X
Alternatively, you can use simpler shortcuts for basic arrows:
- Up Arrow: Alt + 24
- Down Arrow: Alt + 25
- Right Arrow: Alt + 26
- Left Arrow: Alt + 27
These shortcuts save time and eliminate the need to search for symbols manually.
Typing advanced arrows (e.g., ↔, ↕, ⇄, ⇅)
For advanced arrows, you can use additional shortcuts. These include arrows that show double directions or special movements. Some examples are:
- Left/Right Arrow: Alt + 29
- Up/Down Arrow: Alt + 23
These shortcuts allow you to add more complex arrows to your document. They are especially useful for diagrams or flowcharts.
Arrow Shortcut Workflow
Below is a visualization of how to use keyboard shortcuts for arrows:
flowchart TD
    A[Place cursor in document] --> B[Hold Alt key]
    B --> C[Type numeric code for arrow]
    C --> D[Release Alt key]
    D --> E{For advanced arrows?}
    E -->|Yes| F[Add Alt + X at the end]
    E -->|No| G[Arrow appears]
    F --> G
Inserting Arrows via Special Characters
Accessing the "Special Characters" tool in Google Docs
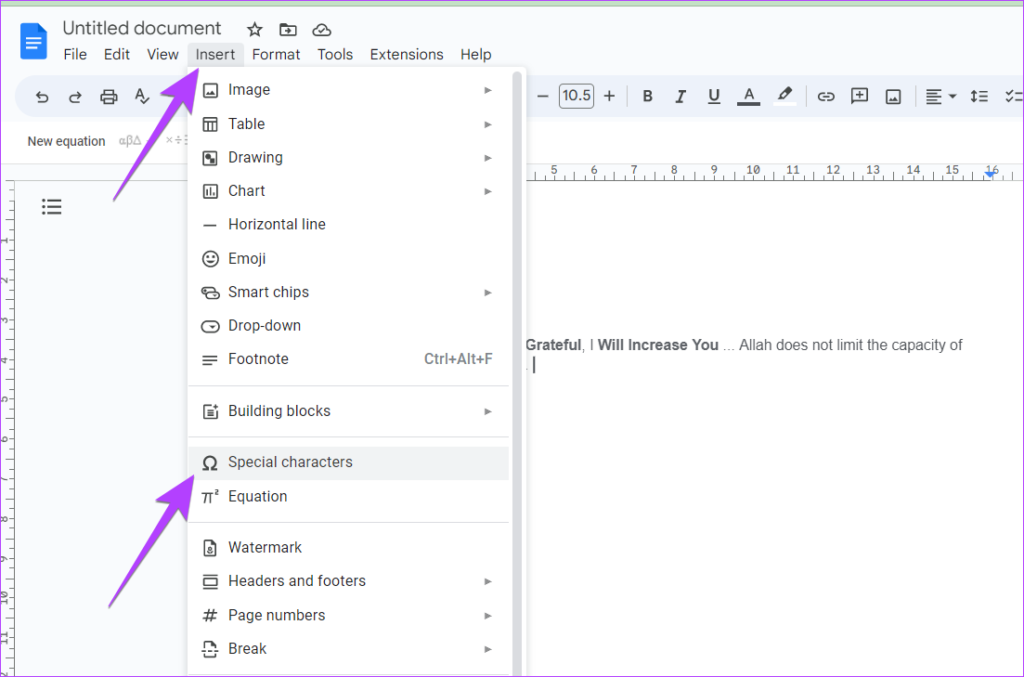
If you prefer not to use shortcuts, the "Special Characters" tool in Google Docs offers a simple way to insert arrows. Follow these steps:
- Open your document or create a new one.
- Go to the menu bar and select Insert > Special characters.
- In the character picker, choose the type of symbol you need.
- Use the search field to find arrow symbols or scroll through the options.
- Click on the desired arrow to insert it into your document.
This method is user-friendly and works on both Windows and Mac devices.
Searching for and inserting arrow symbols
The "Special Characters" tool includes a wide variety of arrow symbols. Here's a table of some commonly used options:
- ←: Leftwards Arrow Symbol
- ↑: Upwards Arrow Symbol
- →: Rightwards Arrow Symbol
- ↓: Downwards Arrow Symbol
- ⇓: Downwards Double Arrow Symbol
- ⇔: Left Right Double Arrow Symbol
- ⇕: Up Down Double Arrow Symbol
You can use the search bar to type keywords like "arrow" or "double arrow" to find these symbols quickly.
Drawing Arrows with Google Drawings
Opening the Google Drawings tool
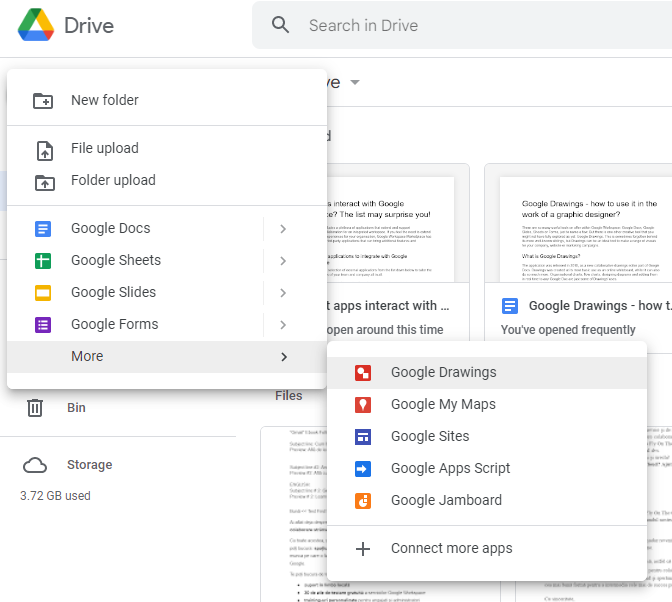
Google Drawings allows you to create custom arrows directly in your document. To access this tool:
- Open your document.
- Go to the menu bar and select Insert > Drawing > + New.
- The Google Drawings interface will open in a new window.
This tool is ideal for creating arrows with unique designs.
Creating and customizing arrows (e.g., size, color, style)
In Google Drawings, you can draw arrows and customize their appearance. Use the toolbar to select the Line tool and choose the arrow option. After drawing the arrow, you can adjust its:
- Color: Pick a color that matches your document's theme.
- Thickness: Make the arrow thicker for better visibility.
- Style: Choose from different arrowhead styles to suit your needs.
You can also add text labels to your arrows for clarity. These customization options help you create visually appealing and professional-looking arrows.
Using Equations for Arrows
Typing arrows using the equation editor
The equation editor in Google Docs provides a unique way to insert arrows, especially if you need them for mathematical or scientific purposes. You can use LaTeX commands or select arrows directly from the equation editor. Follow these steps to type arrows using this tool:
- Open your Google Docs document.
- Click on Insert in the top menu and select Equation.
- A new equation toolbar will appear below the menu bar.
- To create an arrow above text, type
\vecin the equation box and press the Spacebar. This will add an arrow above the blank space. - Type the desired letters or symbols, and the arrow will appear above them.
Alternatively, you can use LaTeX codes to insert arrows. Enclose the code for your arrow in double dollar signs ($$). For example, typing $$\rightarrow$$ will display a rightward arrow. This method is ideal for users familiar with LaTeX syntax.
Adding Arrows in Google Docs on Mac Devices
Keyboard Shortcuts for Mac
Typing basic and advanced arrows on Mac
Typing arrows on a Mac is straightforward when you use keyboard shortcuts. These shortcuts allow you to insert both basic and advanced arrow symbols quickly. For basic arrows, press the Option key along with specific numbers. Here are the shortcuts you can use:
- Left Arrow: Option + 27
- Right Arrow: Option + 26
- Up Arrow: Option + 24
- Down Arrow: Option + 25
Mac vs. Windows Arrow Shortcut Comparison
This chart compares the keyboard shortcuts for arrow insertion across platforms:
Using the Character Viewer
Accessing the Character Viewer on Mac
The Character Viewer is a built-in tool on Mac that helps you insert symbols, including arrows, into your Google Docs. To access and use it, follow these steps:
- Place your cursor in the document where you want the arrow.
- Open the Character Viewer by clicking the Edit menu in the top bar and selecting Emoji & Symbols.
- In the left panel, choose the category that contains arrows, such as Arrows or Symbols.
- Scroll through the options and highlight the arrow you want to use.
- Double-click the arrow to insert it into your document.

This method is user-friendly and works well for inserting a variety of arrow styles.
Mac Character Viewer Workflow
Below is a visualization of how to use the Character Viewer on Mac:
flowchart LR
    A[Place cursor in document] --> B[Edit > Emoji & Symbols]
    B --> C[Select Arrows category]
    C --> D[Browse or search for arrow]
    D --> E[Double-click to insert]
Formatting and Design Tips for Using Arrows in Google Docs

Enhancing Visual Appeal with Arrows
Using arrows to create flowcharts and diagrams
Arrows can transform your document into a visually engaging and organized piece. They are especially useful for creating flowcharts and diagrams. To make your arrows stand out, you can:
- Adjust the thickness: Use the Line Weight tool to make your arrows more prominent.
- Experiment with styles: Try dashed, dotted, or solid lines to convey different relationships or movements.
- Add text labels: Label your arrows with text boxes to clarify their purpose or direction.
- Use consistent colors: Stick to a color scheme that aligns with your document's theme.
When designing flowcharts, keep your arrows simple and consistent. This ensures your diagram remains clear and easy to follow.
Styling arrows with colors and line thickness
Styling arrows can elevate the professionalism of your document. You can adjust their appearance directly in Google Docs. Here's how:
- Click on the Line Color icon to change the arrow's color. Choose colors that highlight important points without overwhelming the reader.
- Use the Line Weight icon to adjust the thickness. Thicker arrows draw attention to key flows or directions.
- Combine color and thickness for maximum impact. For example, a bold red arrow can emphasize critical steps in a process.
Always ensure your arrows are appropriately sized and styled to match the content they point to.
Organizing Content with Arrows
Using arrows for bullet points and lists
Arrows can replace traditional bullet points to create a dynamic and engaging list. For example:
- ➡️ Highlight key steps in a process.
- ⬆️ Show progression or hierarchy.
- ↔️ Indicate relationships between items.
This approach makes your lists more visually appealing and easier to understand. Use arrows sparingly to maintain clarity.
Tip: Keep your formatting consistent throughout the document. This creates a cohesive and professional design that is easy to navigate.
You now have nine effective methods to type and insert arrows in Google Docs. Each method offers unique benefits, from quick keyboard shortcuts to creative tools like Google Drawings. For most users, keyboard shortcuts remain the fastest and easiest option. Arrows enhance your document's design by improving organization and visual flow. Use them to create diagrams, highlight key points, or add a modern touch to your lists.
PageOn.ai: A Powerful AI Tool for Presentations
What is PageOn.ai?
Overview of PageOn.ai's features
PageOn.ai is an advanced platform designed to simplify the process of creating presentations. It uses artificial intelligence to generate professional slides quickly and efficiently. You can take advantage of its features to save time and enhance the quality of your work. Some of its standout features include:
- AI-Driven Efficiency: The platform generates slides automatically based on your input, reducing manual effort.
- Customization and Interactivity: You can choose from a variety of templates and add interactive elements to engage your audience.
- Collaboration and Insights: PageOn.ai supports real-time collaboration and provides analytics tools to track audience engagement.
- Data Analysis and Reporting: It analyzes data and creates detailed reports in presentation format.
- Customizable Data Charts: You can use its charting tools to visualize data clearly and effectively.
These features make PageOn.ai a powerful tool for creating impactful presentations.
How to Use PageOn.ai
PageOn.ai Workflow
Follow this simple process to create presentations with PageOn.ai:
flowchart TD
    A[Visit PageOn.ai website] --> B[Input presentation topic]
    B --> C[Upload reference files]
    C --> D[Review AI-generated outline]
    D --> E[Choose a template]
    E --> F[Customize the presentation]
    F --> G[Save or download]
Step 1: Visit the PageOn.ai website
Start by navigating to the PageOn.ai website. The platform's user-friendly interface makes it easy to get started.
Step 2: Input your topic and upload reference files
Enter the topic of your presentation in the designated field. You can also upload reference documents to provide additional context for the AI.
Step 3: Review the AI-generated outline and choose a template
PageOn.ai will analyze your input and generate an outline for your presentation. Browse through the available templates and select one that suits your needs.
Step 4: Customize the AI-generated presentation
Once the slides are generated, you can edit the content to match your preferences. Adjust the text, images, and layout to ensure your presentation aligns with your vision.
Step 5: Save or download your presentation
After finalizing your slides, save your work to the cloud or download it to your device. This ensures you can access your presentation whenever you need it.
Why PageOn.ai is Worth Trying
AI-powered search and content generation
PageOn.ai uses advanced AI to create structured presentations based on your input. This feature saves time and ensures your slides are coherent and professional.

Collaboration and cloud storage features
The platform allows you to collaborate with others in real time. You can share your presentation with team members and work together seamlessly. Its cloud storage feature ensures your files are accessible from any device.
AI image generation for presentations
PageOn.ai includes tools for generating images that complement your slides. These visuals enhance the overall impact of your presentation, making it more engaging for your audience.
Pro Tip: Explore PageOn.ai to elevate your presentations. Its AI tools simplify slide creation and ensure professional results every time.
You Might Also Like
Automating Research and Outlining for Educational Slides | AI-Powered Visual Learning
Discover how AI automation revolutionizes educational slide creation, reducing preparation time from hours to minutes while enhancing learning outcomes through powerful visual presentations.
Maximizing Conversion: Strategic Free Trial Design for AI Presentation Platforms
Discover proven strategies for designing effective free trials for AI presentation platforms. Learn how to balance feature access, create compelling user journeys, and drive conversions.
Mastering Dynamic Aspect Ratios in Modern Presentations | PageOn.ai
Discover how dynamic aspect ratio technology transforms presentation impact across devices and platforms. Learn implementation techniques, design principles, and future trends with PageOn.ai.
Transforming Content Discovery: Filtered Views and Metadata for Better Organization
Discover how filtered views and metadata can revolutionize content discovery and organization. Learn implementation strategies and visualization techniques with PageOn.ai.