How to Mask an Image in Google Slides for Beginners: 2 Easy Ways
Image masking is a technique that lets you reshape or crop an image into a specific form, such as a circle or star. This method improves the visual appeal of your slides and helps you create a polished presentation. It allows you to highlight key elements, ensuring your audience focuses on the most important details. Masking also keeps your slides clean and professional, even when using complex visuals. If you want to learn how to mask an image in Google Slides, this guide will help you master the process with ease.
What You'll Learn in This Guide
flowchart TD
    A[Image Masking in Google Slides] --> B[Built-in Tools Method]
    A --> C[Custom Shapes Method]
    B --> D[Quick & Simple Shapes]
    C --> E[Unique & Creative Designs]
    D --> F[Professional Presentations]
    E --> F
What Is Image Masking and Why Use It in Google Slides?
Definition of Image Masking
Image masking is a graphic design technique that allows you to isolate specific parts of an image. This process helps you make targeted adjustments or enhancements to those areas. Unlike traditional cropping tools that create sharp edges, masking provides smooth transitions and intricate details. It gives you precise control over which parts of the image remain visible and which parts are hidden. By using this method, you can create visually appealing designs that stand out in your presentations.
In Google Slides, image masking lets you reshape an image into various forms, such as circles, stars, or custom shapes. This feature is especially useful when you want to add a creative touch to your slides without needing advanced design skills.
Common Scenarios for Using Image Masking in Google Slides
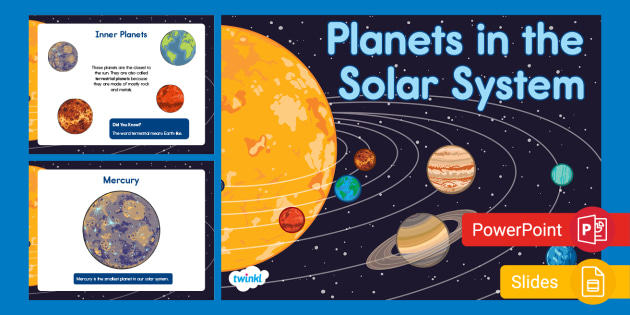
You can use image masking in various scenarios to improve your presentations. In educational settings, masking can help you emphasize key topics. For instance, you might use circular masks to display planets in a solar system lesson. In business and marketing presentations, masking creates a polished look by incorporating brand colors and shapes. This approach ensures your slides align with your company's identity. For creative projects, custom shapes can add an artistic flair, showcasing your originality and creativity.
Masking is also useful when you want to simplify complex visuals. By focusing on specific parts of an image, you can make your slides easier to understand. Whether you're working on a school project, a business pitch, or a creative portfolio, image masking in Google Slides can help you achieve professional and visually appealing results.
How to Mask an Image in Google Slides Using Built-in Tools

Built-in Masking Process
flowchart LR
    A[Insert Image] --> B[Access Masking Tool]
    B --> C[Select Shape]
    C --> D[Adjust Image]
    D --> E[Save & Finalize]
Step 1: Insert an Image into Google Slides
To begin, you need to add an image to your slide. Open your Google Slides presentation and navigate to the slide where you want to work. Click on the "Insert" tab in the top menu, then select "Image." You can choose to upload an image from your computer, search the web, or pick one from your Google Drive. Once the image appears on your slide, click on it to select it. Adjust its size and position to fit your design. This step ensures your image is ready for masking.
Step 2: Access the Masking Tool
After inserting the image, you can access the masking tool. Select the image by clicking on it. Look at the toolbar above your slide. Next to the crop icon, you'll see a small arrow. Click on this arrow to open the masking options. This tool allows you to reshape your image into various forms, such as circles, stars, or rectangles. It's easy to use and only takes a few clicks to transform your image.
Step 3: Select a Shape for the Mask
Once the masking tool is open, you'll see a variety of shapes to choose from. These include basic geometric patterns like circles and rectangles, as well as themed shapes like stars and hearts. Click on the shape that best fits your design. Your image will automatically adjust to match the selected shape. If needed, you can resize or reposition the image within the mask by dragging its corners. This flexibility helps you focus on the most important parts of the image.
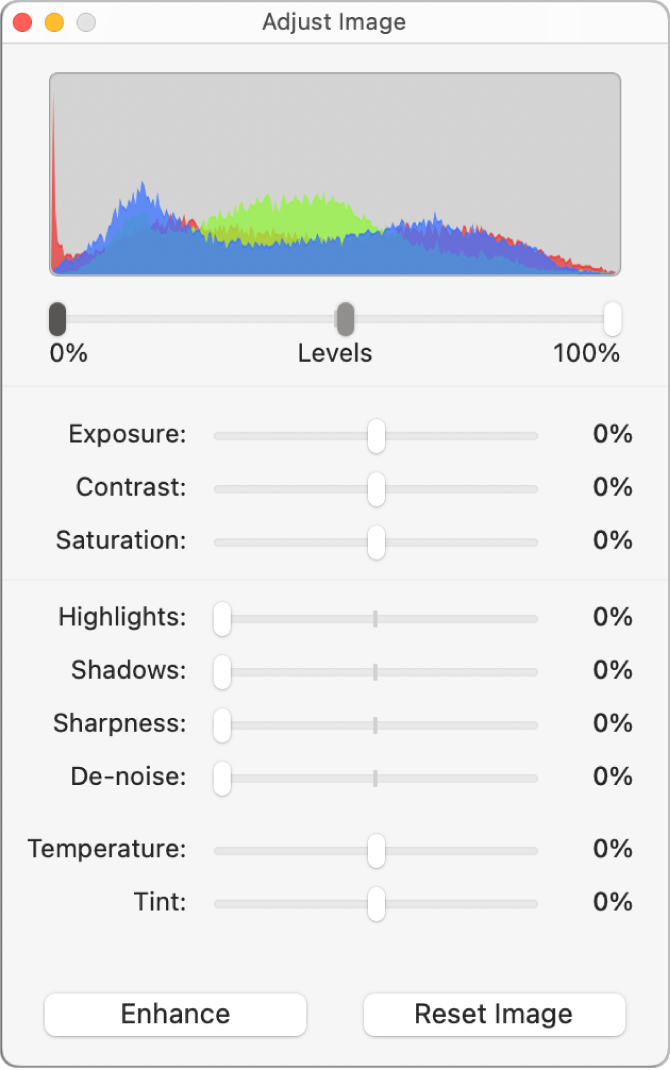
Step 4: Adjust the Image Within the Mask
Once you've applied a shape to your image, you can fine-tune its appearance. Click on the masked image to select it. You'll notice small blue handles around the edges. These handles allow you to resize the image or adjust its position within the mask. Drag the handles inward or outward to make the image larger or smaller.
If you want to reposition the image inside the mask, double-click on it. This action opens the cropping mode, where you can drag the image to align it perfectly with the shape. For example, if you're using a circular mask, you might want to center the most important part of the image within the circle. Use this step to ensure the image looks balanced and visually appealing.
Tip: Pay attention to the edges of the image while adjusting. Avoid cutting off important details or leaving too much empty space within the mask. A well-aligned image creates a polished and professional look.
Step 5: Save and Finalize the Masked Image
After you've adjusted the image, it's time to finalize your work. Click outside the image to exit the editing mode. Review the slide to ensure the masked image fits well with the overall design. If you're satisfied with the result, save your presentation to keep the changes.
To save your work, click on "File" in the top menu and select "Save" or "Save as." If you're collaborating with others, Google Slides automatically saves your progress in real time. However, it's always a good idea to double-check that your changes are secure.
Note: If you need to make further edits, you can always go back and adjust the mask or image. Google Slides allows you to modify your work without starting over, giving you flexibility and control.
How to Mask an Image in Google Slides with Custom Shapes

Step 1: Create or Insert a Custom Shape
To start, you need a custom shape that will serve as the mask for your image. Google Slides offers two ways to create or insert custom shapes.
-
Using the Line Tool:
- Access the Line Tool from the toolbar.
- Select the "Polyline" option to draw a freeform shape.
- Click and drag to outline your desired shape.
- Close the shape by clicking the starting point.
- Customize the shape's color, border, or size using the toolbar options.
-
Uploading a Custom Shape File:
- If you already have a shape file, go to Insert > Image > Upload from your computer.
- Select your file and click Open.
- Adjust the shape's size and position on your slide.
Custom Shape Masking Process
Step 2: Position the Shape Over the Image
Once your custom shape is ready, place it over the image you want to mask. Drag the shape to the desired position on the slide. Ensure the shape covers the part of the image you want to highlight. For precise alignment, use the gridlines or guides in Google Slides. These tools help you position the shape accurately. If the shape needs resizing, click and drag its corners to adjust its dimensions.
Step 3: Use the Crop Tool to Apply the Mask
After positioning the shape, it's time to apply the mask. Hold down the "Shift" key and select both the shape and the image. Right-click on the selection and choose "Mask with shape" from the menu. Google Slides will crop the image to match the shape's outline.
Step 4: Adjust the Mask and Image Alignment
After applying the mask, you can refine the alignment to achieve a polished look. Start by selecting the masked image. Use the blue handles around the edges to resize the image or the mask. Drag these handles inward or outward to adjust the dimensions. This step ensures the image fits perfectly within the shape.
To reposition the image inside the mask, double-click on it. This action opens the cropping mode, allowing you to drag the image to align it with the mask. For example, if you are using a star-shaped mask, center the most important part of the image within the star. This adjustment helps highlight the key elements of your design.
Tip: Group multiple masked images together to lock their positions. This prevents accidental misalignment when editing other elements on the slide.
Step 5: Save and Use the Masked Image
Once you are satisfied with the alignment, save your work. Click outside the masked image to exit the editing mode. Review the slide to ensure the masked image fits seamlessly into your design. If everything looks good, save your presentation. Google Slides automatically saves your progress, but it is always a good idea to double-check.
Why PageOn.ai Is the Best Tool for Presentation Creation
Creating professional presentations can be time-consuming, but PageOn.ai simplifies the process with its innovative features. This AI-powered platform combines advanced technology with user-friendly tools, making it an excellent choice for anyone looking to create engaging and polished slides. Whether you are a student, a business professional, or a creative designer, PageOn.ai offers everything you need to elevate your presentations.
Key Features of PageOn.ai
PageOn.ai stands out because of its ability to streamline the presentation creation process. It uses AI technology to generate content, analyze data, and design visuals, saving you hours of manual work. The platform supports various file types, including PDFs, Word documents, and CSV files, allowing you to convert them into slides effortlessly. Its intuitive interface ensures smooth navigation, even for beginners. You can also personalize your presentations with custom themes, ensuring your slides align with your unique style or brand identity.
PageOn.ai Benefits Comparison
How to Use PageOn.ai for Professional Results
Step 1: Visit the PageOn.ai Website
Start by accessing the PageOn.ai platform. The website provides all the tools you need to begin creating your presentation.
Step 2: Input Your Topic or Upload Reference Files
Define your topic by entering it into the platform. If you have reference files like PDFs or Word documents, upload them to provide additional context for your presentation.
Step 3: Review the AI-Generated Outline and Choose a Template
PageOn.ai will generate an outline based on your input. Review this outline and select a template that matches your presentation's theme. The platform offers a variety of templates to suit different styles and purposes.

Step 4: Customize the Presentation (Themes, Charts, Images)
Once you've chosen a template, customize it to fit your needs. Add or edit text, insert charts, and include images to enhance your slides. You can also adjust the theme to ensure your presentation aligns with your vision.
Step 5: Save or Download Your Presentation
After finalizing your slides, save your work. PageOn.ai allows you to download your presentation or share it directly with others. This flexibility ensures your presentation is ready for any audience.
Tips and Tricks for Masking an Image in Google Slides
Maintaining Image Quality During Masking
To ensure your masked images look professional, always prioritize image quality. Start by using high-resolution images. Low-resolution images often appear pixelated or blurry, especially when resized. Enlarging small images can also lead to a loss of clarity. Instead, choose images that maintain their sharpness even when adjusted.
When masking, avoid over-editing the image. Excessive resizing or cropping can reduce its quality. If you need to adjust the size, do so gradually and check the results frequently. This approach helps you maintain the image's original details.
Tip: Before inserting an image into Google Slides, preview it at the size you plan to use. This step ensures the image remains clear and visually appealing after masking.
Choosing the Right Mask Shape
flowchart TD
    A[Choose Mask Shape] --> B{What's Your Content?}
    B -->|Portraits/Logos| C[Circle/Oval]
    B -->|Landscapes| D[Rectangle/Square]
    B -->|Abstract Images| E[Custom Shapes]
    C --> F[Professional Look]
    D --> G[Preserve Details]
    E --> H[Creative Appeal]
    F --> I[Finalize Design]
    G --> I
    H --> I
Avoiding Common Mistakes in Masking the Image
While masking can elevate your slides, certain mistakes can detract from their quality. Overcrowding your slides with too many masked images can overwhelm your audience. Use masking sparingly to highlight key visuals.
Pay attention to contrast. Ensure your masked image stands out against the background. Poor contrast can make your image hard to see, reducing its impact. Additionally, avoid distorting the shape or image. Always maintain the aspect ratio when resizing to prevent unnatural stretching.
Tip: Review your slides after masking to ensure they appear balanced and professional. Small adjustments can make a big difference in the final result.
Creative Applications of Image Masking in Presentations
Image masking opens up endless possibilities for enhancing your presentations. By using this technique creatively, you can transform ordinary slides into visually captivating designs that leave a lasting impression. Here are some innovative ways you can apply image masking in your presentations.
- Highlighting Key Data: Use image masking to emphasize specific data points in charts or graphs. For example, you can mask a portion of a graph with a circular shape to draw attention to a critical statistic. This approach ensures your audience focuses on the most important information.
- Creative Typography: Apply image masks to text to create unique and visually appealing typography. For instance, you can fill letters with an image of a cityscape or a gradient pattern. This technique works well for title slides or when you want to make a bold statement.
- Engaging Transitions: Incorporate masking into your slide transitions for a smooth and professional effect. You can use shapes to reveal or hide parts of an image as you move from one slide to the next. This method adds a dynamic touch to your presentation and keeps your audience engaged.

Conclusion
You now know two simple ways to mask images in Google Slides. The built-in mask image tool lets you quickly reshape visuals into circles, stars, or other forms. Custom shapes give you more flexibility to match your presentation's theme. Always use high-quality images and avoid overcropping important details. Consistent styles and strategic masking can make your slides look polished and professional.
Experimenting with masking techniques can unlock your creativity. Use them to highlight key topics in educational slides, create a cohesive look for business presentations, or add artistic flair to creative projects. Tools like PageOn.ai can further simplify your workflow, helping you design engaging and efficient presentations. Start exploring these techniques today to elevate your next Google Slides presentation.
Ready to Create Professional Presentations?
Discover how PageOn.ai can help you create stunning presentations with advanced AI features that save time and enhance quality.
Try PageOn.ai TodayYou Might Also Like
Beyond "Today I'm Going to Talk About": Creating Memorable Presentation Openings
Transform your presentation openings from forgettable to captivating. Learn psychological techniques, avoid common pitfalls, and discover high-impact alternatives to the 'Today I'm going to talk about' trap.
Transform Any Content into Professional Slides: The Ultimate Conversion Guide
Learn expert techniques for converting documents, presentations, and visual content into professional slides with this comprehensive guide to content format transformation.
Audience-Centered Pitching Techniques: Visual Strategies That Win Every Time
Discover powerful audience-centered pitching techniques using visual storytelling, interactive engagement, and benefit visualization strategies that consistently win over any audience.
Multi-Format Conversion Tools: Transforming Modern Workflows for Digital Productivity
Discover how multi-format conversion tools are revolutionizing digital productivity across industries. Learn about essential features, integration strategies, and future trends in format conversion technology.