Step-by-Step Guide to Remove Section Breaks in Google Docs 2025
Removing section breaks in Google Docs is simple. To learn how to remove section break in Google Docs, place your cursor at the start of the section break and press the Delete or Backspace key. Managing section breaks effectively ensures your document looks professional and organized.
What Are Section Breaks in Google Docs and Why Use Them?
Definition of Section Breaks
Section breaks in Google Docs are tools that divide your document into separate sections. Each section can have its own formatting, layout, or properties. For example, you can apply unique headers, footers, or page numbering to different sections. Google Docs offers several types of section breaks, including "Next Page," "Continuous," and "Even Page." These options allow you to control how your content appears and flows across pages.
Types of Section Breaks in Google Docs
The following chart shows the different types of section breaks and their usage frequency:
Common Use Cases for Section Breaks
You might use section breaks in various scenarios to improve the structure and readability of your document. Here are some common examples:
- Compiling a report: Section breaks help you manage different formatting styles from multiple sources, ensuring a smooth and consistent reading experience.
- Formatting a thesis: They allow you to maintain consistent formatting throughout the document while removing unintended breaks that could disrupt the flow.
- Creating newsletters: Section breaks make it easier to organize content into columns or sections, enhancing the visual appeal.
- Designing printed materials: They ensure that new sections start on the correct pages, giving your document a polished and professional look.
Why You Might Want to Remove Section Breaks
While section breaks are useful, they can sometimes cause issues in your document. Excessive or misplaced section breaks may interrupt the flow of ideas, making your writing feel disjointed. They can also complicate collaboration, as team members might struggle to navigate the document or accidentally alter its formatting.
In some cases, section breaks may clash with existing templates, leading to unexpected changes in margins, headers, or other formatting elements. You might also find that adjusting one section's settings unintentionally affects the entire document.
Removing unnecessary section breaks can resolve these problems. It ensures that your document maintains a smooth flow and consistent formatting.
Steps to Remove a Section Break in Google Docs (Desktop)

Locating Section Breaks in Your Document
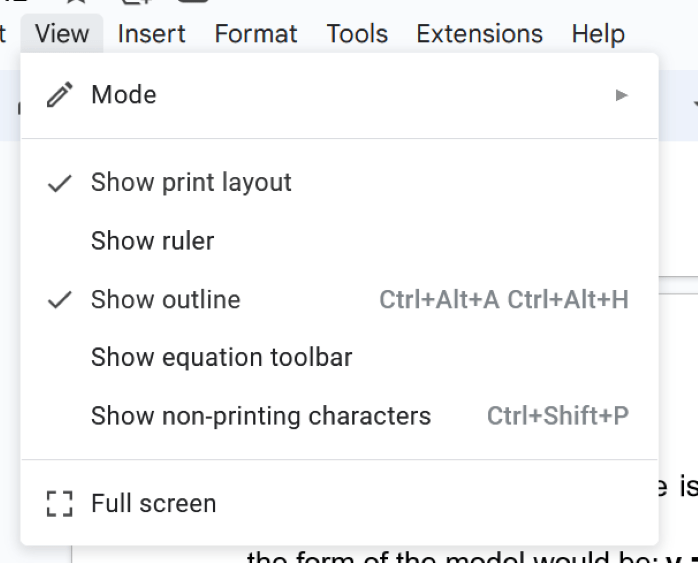
Before you can remove section breaks, you need to locate them in your document. Google Docs provides tools to make this process simple. Follow these step-by-step instructions:
How to Locate Section Breaks
flowchart TD
    A[Open Google Docs] --> B[Click on View Menu]
    B --> C{Choose Method}
    C --> D[Show document outline]
    C --> E[Use Ctrl+Alt+Z shortcut]
    C --> F[Select View > Show > Section breaks]
    D --> G[Identify section breaks as dashed lines]
    E --> G
    F --> G
    G --> H[Position cursor at break]
How to Remove the Section Break
Once you locate the section break, you can delete it using one of two methods. Both are straightforward and effective.
Using the Delete Key
- Place your cursor at the start of the section break.
- Press the Delete key on your keyboard.
- The section break will disappear, and the content from the next section will merge with the previous one.
Using the Backspace Key
- Position your cursor just after the section break.
- Press the Backspace key.
- This action will remove the section break and combine the sections seamlessly.
Verifying and Saving Changes After Deletion
After you delete the section break, verify that your document looks as expected. Scroll through the document to ensure the formatting is consistent and no unintended changes occurred.
To save your changes:
- Click on "File" in the top menu.
- Select "Save" or use the keyboard shortcut Ctrl + S (Cmd + S on a Mac).
Saving your document ensures that your edits are preserved. If you encounter any issues, you can undo the changes by pressing Ctrl + Z (Cmd + Z on a Mac).
How to Remove Multiple Section Breaks Efficiently
Using the Find and Replace Tool
When dealing with multiple section breaks in Google Docs, the Find and Replace tool can save you significant time. This tool allows you to locate and remove section breaks across your document in just a few steps. Follow these step-by-step instructions to use it effectively:
- Open your document in Google Docs.
- Press "Ctrl + H" (Windows) or "Cmd + H" (Mac) to open the "Find and Replace" dialog box.
- In the "Find" field, type the section break code, which is "^\p{Zl}" for "Next Page" breaks.
- Leave the "Replace with" field empty.
- Click "Replace All" to remove all section breaks at once.
Manual Removal for Complex Documents
For documents with intricate formatting, manually removing section breaks may be more effective. This approach gives you greater control over the process. Here's how you can do it:
- Enable the visibility of section breaks by going to "View" > "Show" > "Section breaks."
- Scroll through your document to locate the section breaks.
- Place your cursor at the beginning of the line after the section break.
- Press the Backspace key (or Delete key on Mac) to remove the section break.
Method Comparison: Efficiency vs. Control
Comparing different methods for removing section breaks:
Best Practices for Managing Multiple Section Breaks
Managing section breaks effectively can prevent unnecessary edits later. Here are some best practices to keep in mind:
- Plan your document structure before adding section breaks. Think about the layout and decide where breaks are necessary.
- Use page breaks instead of section breaks for simpler content separation. Page breaks are easier to manage and reduce formatting complications.
- Regularly review your document's formatting. Check for unnecessary section breaks and remove them early to maintain a clean layout.
- Be cautious when copying and pasting content. Unwanted section breaks can appear during this process, so always double-check your document afterward.
How to Remove Section Breaks on Mobile Devices

Accessing Google Docs on Mobile
You can access Google Docs on your mobile device by downloading the Google Docs app from the App Store or Google Play Store. Once installed, open the app and sign in with your Google account. After logging in, you will see a list of your documents. Tap on the document where you want to remove section breaks.
If you don't have the app, you can still use Google Docs through your mobile browser. Open your browser, visit docs.google.com, and log in to your account. While the browser version works, the app offers a smoother experience for editing and formatting.
Locating and Deleting Section Breaks on Mobile
Finding section breaks in Google Docs on mobile requires a few extra steps compared to the desktop version. Open your document and tap the pencil icon in the bottom-right corner to enter editing mode. Scroll through your document to locate the section breaks. These appear as horizontal lines dividing the sections.
Mobile Section Break Removal Process
flowchart TD
    A[Open Google Docs App] --> B[Tap on your document]
    B --> C[Tap pencil icon to edit]
    C --> D[Scroll to find section break]
    D --> E[Place cursor at start of break]
    E --> F[Tap backspace on keyboard]
    F --> G{Did break disappear?}
    G -->|Yes| H[Save document]
    G -->|No| I[Try placing cursor directly on break]
    I --> J[Tap backspace again]
    J --> H
Limitations of Mobile Editing and Workarounds
Editing section breaks on mobile devices has limitations. The smaller screen size and simplified interface can make it harder to locate and delete breaks. Additionally, some advanced formatting options available on the desktop version may not appear in the mobile app.
To overcome these challenges, consider these workarounds:
- Use a tablet instead of a phone for a larger screen and better visibility.
- Switch to the desktop version of Google Docs on your mobile browser for more editing tools.
- Save your document and complete complex edits on a computer when possible.
PageOn.ai: Your Go-To Tool for Creating Perfect Presentations

What Is PageOn.ai?
PageOn.ai is an innovative tool designed to simplify the process of creating presentations. It automates many tasks, ensuring your slides are well-organized and accessible. The platform offers features like high-contrast color options and font adjustments to improve readability. You can add meaningful titles to slides, making navigation easier for screen readers. PageOn.ai also arranges slides in a logical order and provides guidance on adding alt text and visual descriptions.
Key Features and Benefits of PageOn.ai
PageOn.ai stands out because of its user-friendly features. Here's what you can expect:
- Accessibility Enhancements: The tool ensures your presentations meet accessibility standards by offering options like high-contrast colors and alt text suggestions.
- Efficient Slide Organization: It automatically arranges slides in a logical sequence, saving you time.
- Customizable Templates: You can choose from a variety of templates and adjust fonts, colors, and other elements to match your style.
- Ease of Use: The platform simplifies the creation process, making it ideal for both beginners and experienced users.
Step-by-Step Guide to Using PageOn.ai
Searching for PageOn.ai and Accessing the Platform
To get started, visit the PageOn.ai website and sign up for an account. Once registered, log in to access the platform. The interface is intuitive, allowing you to begin creating presentations immediately.
Inputting Your Ideas and Reference Files
Define your presentation topic by entering it into the platform. You can upload relevant files or provide URLs to help the AI generate accurate content. This step ensures the tool understands your requirements and tailors the slides accordingly.
Reviewing AI-Generated Outlines and Templates
After inputting your topic, the AI generates an outline and suggests templates. Review these suggestions carefully. You can adjust the content, select a theme, and ensure the slides align with your vision. This step helps you maintain control over the presentation's structure.
Customizing Your Presentation with AI-Generated Images
PageOn.ai allows you to enhance your slides with AI-generated images. You can add visuals that complement your content, making your presentation more engaging. Adjust the layout and design to ensure everything looks polished and professional.
Saving and Sharing Your Presentation
Once satisfied with your presentation, save it to your device. You can download the file in various formats or share it directly with others. This final step ensures your work is ready for delivery, whether in-person or online.
Troubleshooting Tips for Section Break Issues
Common Problems When Removing Section Breaks
When removing section breaks in Google Docs, you might encounter several challenges. These issues can disrupt your document's flow or formatting. Here are some common problems you may face:
- Text Shifts: After deleting a section break, the text might shift unexpectedly. This often happens when the margins or page layout need adjustment.
- Formatting Changes: Removing a section break can alter the formatting of your document. For example, headers, footers, or columns might not align as intended.
- Reappearing Section Breaks: Sometimes, section breaks seem to reappear after deletion. Saving the document, closing it, and reopening it usually resolves this issue.
- Section Break Won't Delete: If pressing Delete or Backspace doesn't work, check your cursor placement. It must be positioned correctly before the break.
- Unintended Page Breaks: Deleting a section break might create unwanted page breaks. You can fix this by manually inserting a new page break where necessary.
- Section Breaks Not Showing: If you can't see the section breaks, ensure the "Show section breaks" option is enabled under the "View" menu.
How to Fix Formatting Issues After Deletion
After removing a section break, you might notice formatting issues in your document. Follow these steps to resolve them:
- Enable the "Show section breaks" option from the "View" menu. This helps you identify any remaining breaks or formatting inconsistencies.
- Adjust the margins, columns, or other settings manually if the formatting still appears off. This ensures your document looks polished and professional.
- Insert a new page break manually if unwanted page breaks occur. This maintains the flow of your content and prevents disruptions.
Preventing Unwanted Section Breaks in the Future
Preventing unnecessary section breaks in your documents can save you time and effort. Here are some strategies to help you avoid this issue:
- Use Section Breaks Thoughtfully: Plan your document structure before adding section breaks. Thoughtful placement ensures a logical progression of content and enhances readability.
- Plan Your Document Structure: Think about the layout and structure of your document before inserting breaks. This reduces the need for later adjustments.
- Use Page Breaks Wisely: If you only need a new page, use a regular page break instead of a section break. This keeps your document simpler and avoids unwanted formatting complications.
- Regularly Review Formatting: As you edit your document, check your formatting regularly. This helps you identify and remove unnecessary section breaks early.
Conclusion
Removing section breaks in Google Docs becomes simple when you follow the outlined steps. Properly managing these breaks ensures your document remains professional and easy to read. Planning your document structure, using page breaks wisely, and reviewing formatting regularly can save you time and effort.
Tools like PageOn.ai enhance productivity by automating repetitive tasks, allowing you to focus on content creation. With these strategies, you can confidently handle section breaks and maintain a seamless workflow.
Remember that well-formatted documents make a significant difference in how your content is perceived. Taking the time to manage section breaks properly will result in more professional and polished documents.
You Might Also Like
Maximizing Conversion: Strategic Free Trial Design for AI Presentation Platforms
Discover proven strategies for designing effective free trials for AI presentation platforms. Learn how to balance feature access, create compelling user journeys, and drive conversions.
Mastering Dynamic Aspect Ratios in Modern Presentations | PageOn.ai
Discover how dynamic aspect ratio technology transforms presentation impact across devices and platforms. Learn implementation techniques, design principles, and future trends with PageOn.ai.
Revolutionizing Document Conversion: Drag-and-Drop Solutions for Workflow Efficiency
Discover how drag-and-drop document conversion solutions transform workflow efficiency, reduce errors, and save 60%+ time. Learn implementation strategies and future trends.
Automating Research and Outlining for Educational Slides | AI-Powered Visual Learning
Discover how AI automation revolutionizes educational slide creation, reducing preparation time from hours to minutes while enhancing learning outcomes through powerful visual presentations.